Sometimes our hobby with all its focus on neat detail needs a counterweight - that is big, messy work. With my new army for DUX Britanniarum nearly finished, I felt the strong urge to create some new terrain for it. The rigth moment came when my wife had decided it was time to spent a weekend at her parents together with our little doughter. I had the house for myself - and I used it. The result looks like this:
 |
| The new gaming mat |
Well, not all of it was done in two days of course, only the gaming mat. It is not my first one, you can see other mats I have made at our clubs homepage (
here). But since I never have written a tutorial in English, I'll use the oppertunity to write one this time.
The first thing you'll need is a large piece of canvas. I know mats can be done with other, cheaper materials, too, but I have found canvas to be both durable and solid - which it needs to be when you place something under it later on to create hills. I buy the canvas direct from the wholesale trader in a large roll. This gives me near unlimited material to do some more mats in the future - much to the distress of my sweet wife.
Lay out the canvas flat on your table and fix it with something - it will later constrict and you'll need to keep it in place. I have some holes in my gaming table for this purpose to which the canvas is fixed with large screws.
 |
| Step 1: Lay out the canvas and fix it with something - in my example with screws |
 |
| I have reinforced the anchoring point with a slice of metal |
At this point it is important that the canvas should be bigger than your mat will be later on - it will be easy to cut off excess material, but if you cut the material to size to early, the constricting will cause size-problemes later on.
The basic material from which the mat is made is acrylic paste, which can be bought cheap at your local DIY (use the cheapest/ white one), paint and sand. The paint is as well from the DIY - the cheapest and biggest pots of acrilyc paint you can buy in all colors associated with earth, mud and groundwork. Mix a large pot with paint and some water, and add first sand and than acrylic paste. You will at least need four tubes of acrylic paste for a mat 180x120cm.
 |
| Step 2: Arrange what you will need and prepare a large amount of paint in a container. This will get messy, so best use something as a container that you can throw away later - like the bottom of a water conatiner I have used here. | | | | |
 |
| Put in the acrylic paste and birdsand and mix them thoroughly - medical gloves that can easily discarded come in handy |
 |
| Best not to show the result in too big a picture - I know what it looks like, but it smells better... |
Now the fun begins - spread out the mixtures on your canvas. Use your hands here - I have experimented with all sorts of brushes, scrapers and spatula, but the material will stick to your tools instead of the canvas. So use your hands wrapped up in medical gloves. It is really messy, so you best enjoy it.
For my mat I wanted a road, some fields and a village, so I first I blocked in these areas with the dark mixture...
 |
| Step 3: Bring the acryl-sand-paint - mixture to the canvas (I really don't know why the scraper lies there - it has not been used during the process) |
... and then I put the other material around it. Obviously if you want a more generic mat without fixed geographic features you don't need to mix several shades, just use one big container. But I'm not a fan of superimposed flexible roads, and this mat is especially made for 28mm skirmish games (well, for DUX Britanniarum, to be honest).
 |
| Use your hands (best in gloves) while spreading the material, and be careful not to spread it on the floor and your clothes - I know it will happen anyway but don't say I have not warned you ;-) |
Now you want to be fast, because the next step has to be done while the mixture is still wet. Apply now static grass in different shades, little rocks and bushes, colored sand - everything you have at hand. If you do large areas it works good to throw the material up in the air - it will rain down evenly and give a more natural effect. In my case I had to be more careful, because I did not want too much flocking material on the road. Note that you don't need glue - just cover the whole surface as quickly as possible für the mixture to be sufficently moist and sticky.
 |
| Step 4: Use every flocking material you can lay your hands on. If you are just a little bit like me, you will have an ample supply of it. |
At this point you should have noticed why it is a wise move to wait with this project until you have the house for yourself. Should you still think your partner is tolerant enough to try it anyway, you'll break the limit at the next step of the process. But before that, put in a few hours of movies and/or sleep. The acrylic paste has to dry, and it best does this with an open window.
Now if everything has had time to dry up thoroughly, you can see why it was important to leave some excess-canvas all around the surface and especially why it is important to fix the canvas to the table. The drying acryl will constrict and has quite a force in doing so - if you forgot to fix the canvas, you will by now probably have a little shrunken ball in the middle of your table instead of a flat canvas.
Anyway, the material is dry now and you can use a very sharp stanley knive to cut away the borders which will leave you with a neat mat in the required size.
Then comes an interesting part from which depends whether you can spent the rest of the day gaming or cleaning the house. The excess-material has to be shaken off the mat. What I do is lift first one half of the mat and jiggle it, than the other half, and then I pour everything that has accumulated in the middle in a container. It is good to get as much of the material back as possible, as you can use it the next time. Afterwards I roll up the mat (yes, you can do that), carry it outside and give it the treatment of an old carpet.
 |
| Step 5: Shake off the excess-flocking material and repair a few parts with paint and glue + flock, then your are done |
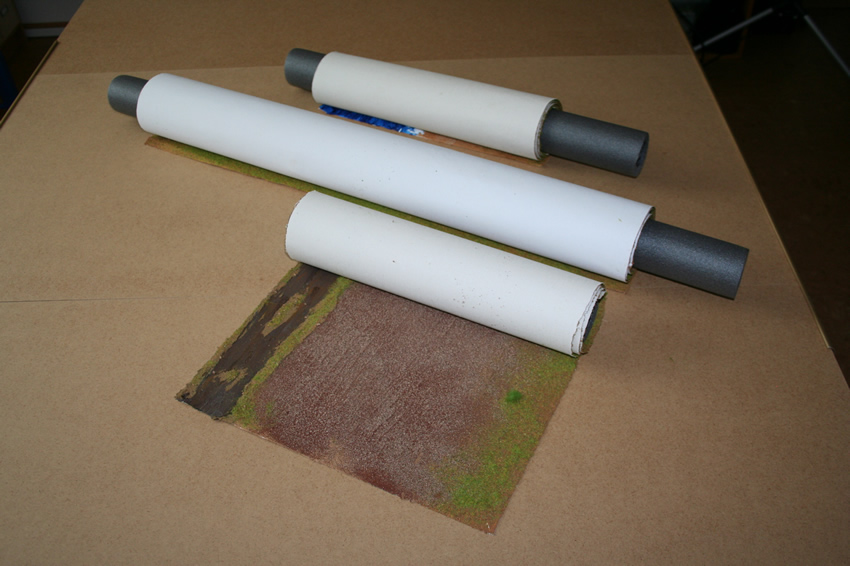
Well, that was it. Know you can use your mat, and you can roll it up for storage. For rolling up I propose using mantling material for pipes - this is soft and durable.
The good thing about gaming mats is not only that they look beautiful and are easy to store and transport, but that you can simply put books or similar under it to get naturally looking soft hills - like I did here underneath the wood in the background. Now the thick material of the cancvas comes into play - it is so durable that it will carry your miniatures even if it is stretched between table and book and has nothing but air underneath.
 |
| Some books under the trees make for a soft hill |
Some parting shots of the landscpae - I really like how this has turned out.
I hope you like the result, too. Next will be more pictures with some miniatures in it. Thanks for your visit and have a nice day,
Tobi